





详情可见:
blue
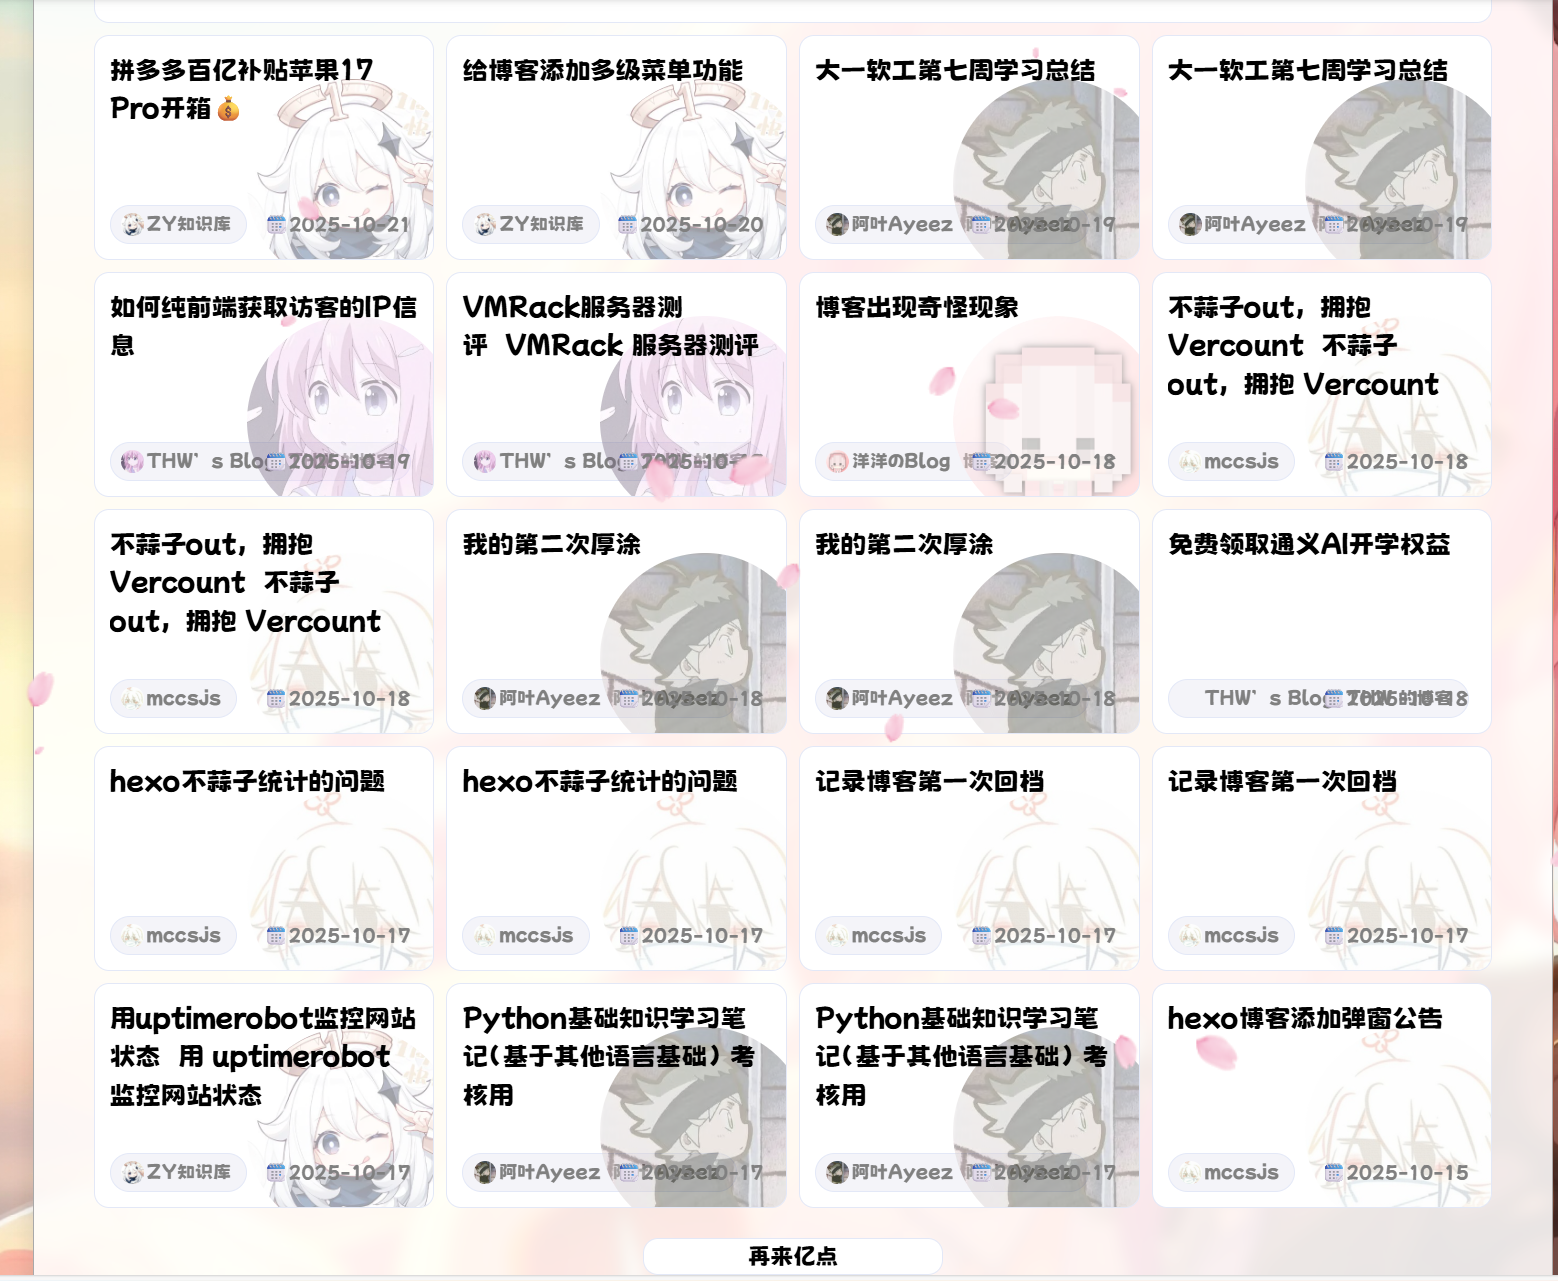
本博客的是根据liushen柳清扬大佬的开源项目,修复了bug使用
复刻修改项目
- 首先复刻我的仓库,
不要勾选仅复刻main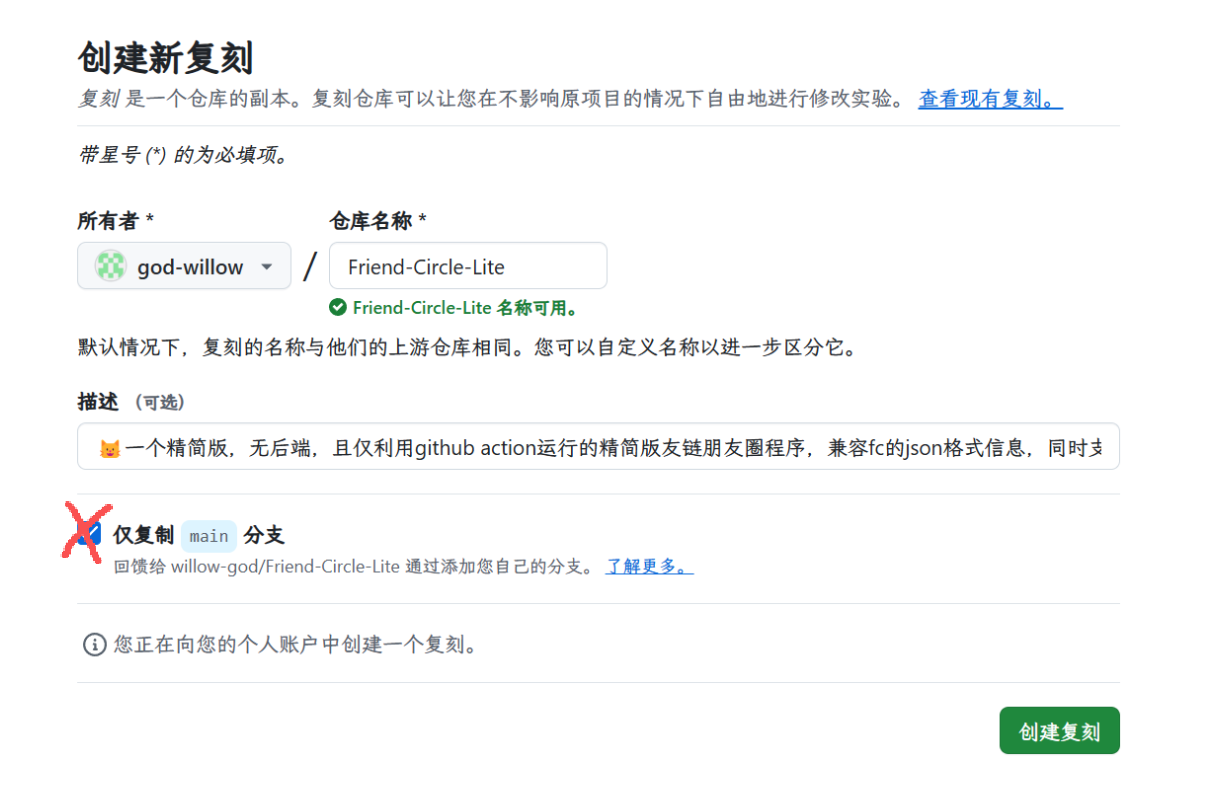
- 修改仓库根目录的
conf.yaml
spider_settings:
  enable: true
  json_url: "https://你的博客域名/friend.json"
  article_count: 5
  merge_result:
    enable: true
    merge_json_url: "https://你为朋友圈设置的域名"
你可以先填,文件在下文会实现
2. 继续修改conf.yaml
rss_subscribe:
  enable: true
  github_username: willow-god
  github_repo: 朋友圈精简版
  your_blog_url: https://你的博客域名/
  email_template: "./push_templates/default.html"
  website_info:
title: "你的名字/id"-
点击左上角的main,更换为page 删除all.json和errors.json里的全部内容,等会抓取链接的时候会自动更新
-
创建friend.json文件 先创建一个朋友圈页面,再在博客根目录创建link.js
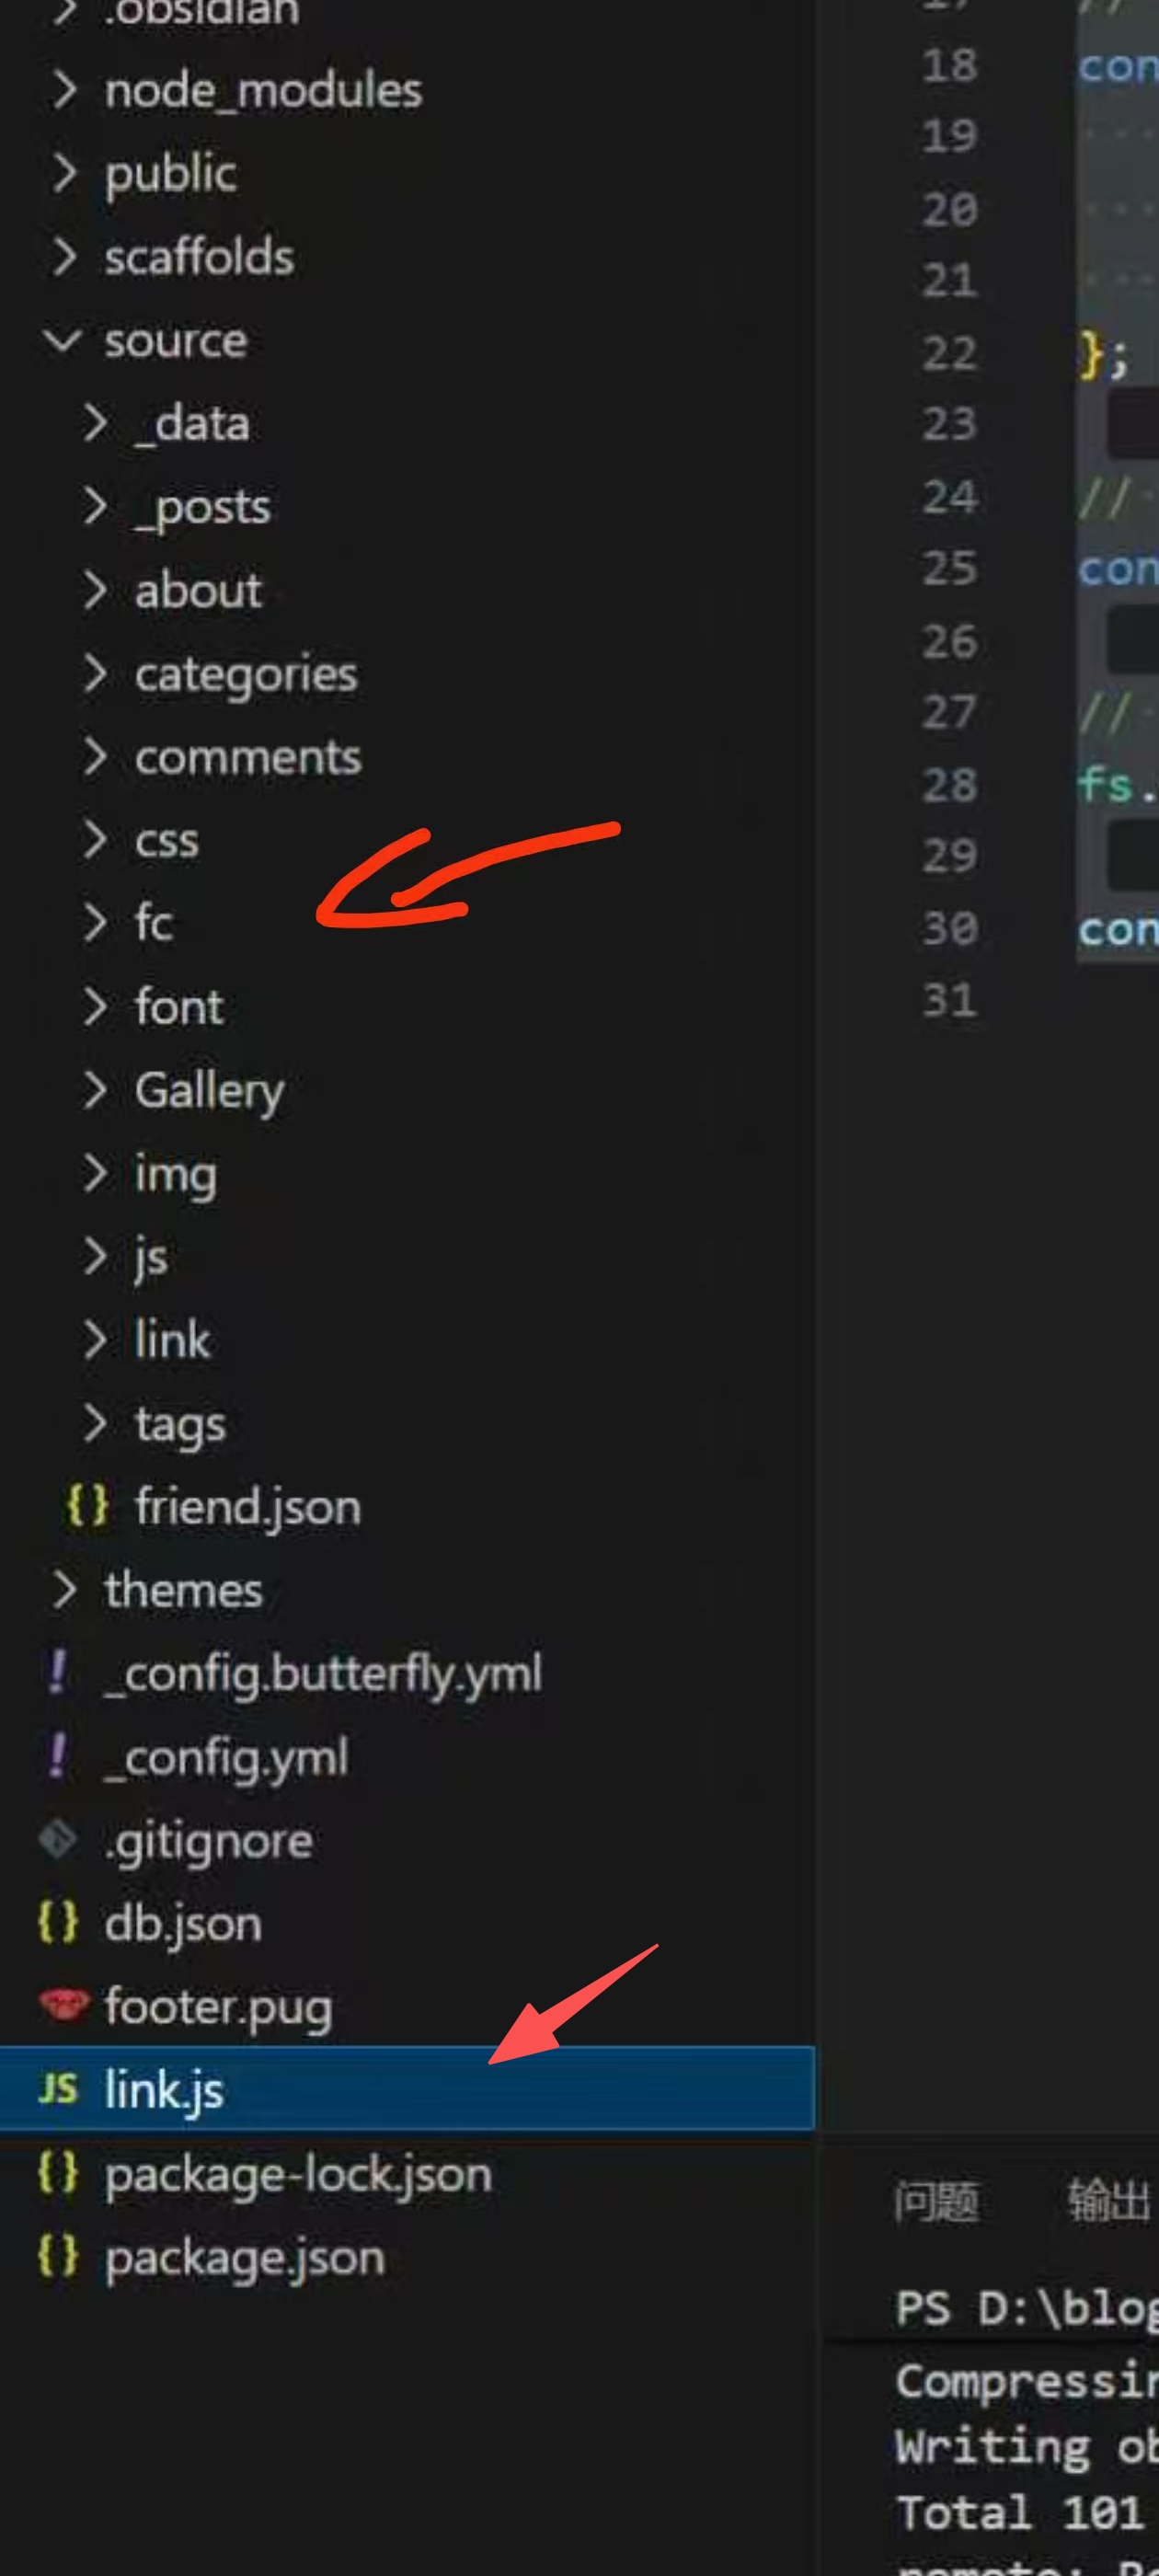
- 创建朋友圈页面
hexo new page fc #fc你可以更换别的并在朋友圈的index.md添加如下代码
<div id="friend-circle-lite-root"></div>

<script>

    if (typeof UserConfig === 'undefined') {

        var UserConfig = {

            // 填写你的fc Lite地址

            private_api_url: 'https://你为朋友圈准备的域名/',

            // 点击加载更多时,一次最多加载几篇文章,默认20

            page_turning_number: 20,

            // 头像加载失败时,默认头像地址

            error_img: 'https://i.p-i.vip/30/20240815-66bced9226a36.webp',

        }

    }

</script>

<link rel="stylesheet" href="https://fastly.jsdelivr.net/gh/willow-god/Friend-Circle-Lite/main/fclite.min.css">

<script src="https://fastly.jsdelivr.net/gh/willow-god/Friend-Circle-Lite/main/fclite.min.js"></script>- 创建link.js
const YML = require('yamljs')
const fs = require('fs')

const blacklist = ["友站名称1", "友站名称2", "友站名称3"]; // 由于某种原因,不想订阅的列表

let friends = [],
    data_f = YML.parse(fs.readFileSync('source/_data/link.yml').toString().replace(/(?<=rss:)\s*\n/g, ' ""\n'));

data_f.forEach((entry, index) => {
    let lastIndex = 2;
    if (index < lastIndex) {
        const filteredLinkList = entry.link_list.filter(linkItem => !blacklist.includes(linkItem.name));
        friends = friends.concat(filteredLinkList);
    }
});

// 根据规定的格式构建 JSON 数据
const friendData = {
    friends: friends.map(item => {
        return [item.name, item.link, item.avatar];
    })
};

// 将 JSON 对象转换为字符串
const friendJSON = JSON.stringify(friendData, null, 2);

// 写入 friend.json 文件
fs.writeFileSync('./source/friend.json', friendJSON);

console.log('friend.json 文件已生成。');
然后依次执行
npm i yamljs --save
node link.js
hexo cl;hexo g;hexo d
这样友链数据就出来了。例:你的博客域名/friend.json
- Cloudflare Pages部署
进入cloudflare点击左侧的
计算和AI,选择workers和pages,点击创建应用程序,选择pages,导入现有 Git 存储库,选择你要部署的项目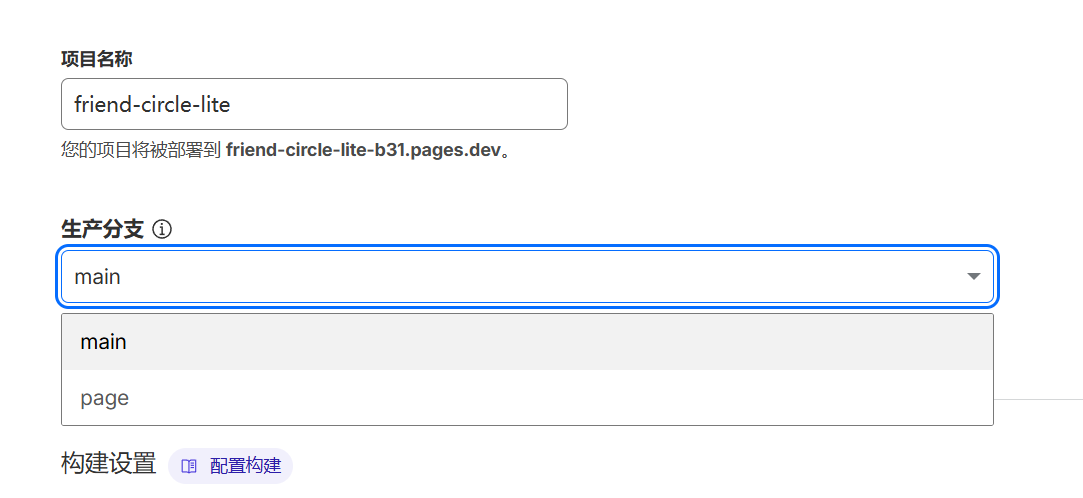 生产分支一定要选page,创建完绑定域名就行
 - 开始运行
打开github朋友圈仓库,点击上方的action,再点击左侧的
Friend circle lite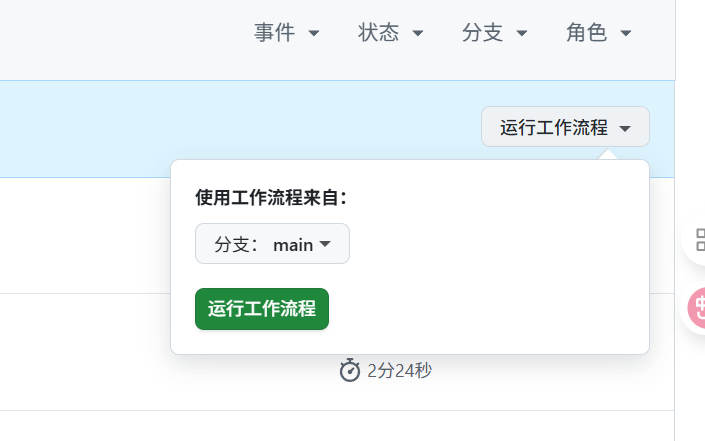
点击运行工作流程,等待几分钟就大功告成了
结尾
朋友圈会自动抓取配置了rss的博客,没有配置的博客不会显示 朋友圈底部的订阅:32 活跃:19,意思是你有32个友链,只有19人配置了rss 这下你访问你朋友圈域名或者博客朋友圈的页面就会显示文章了